In today’s fast-paced world, carving out a serene outdoor space has never been more essential for relaxation and rejuvenation. Whether it’s sipping your morning coffee under the gentle warmth of the sun or gathering with friends for an evening barbecue, your patio serves as an extension of your home, inviting tranquility and connection with nature.
However, the right outdoor chairs and loungers can make all the difference in transforming this space into a personal oasis. Why settle for mass-produced furniture when you can craft your own unique pieces that not only fit your style but also enhance your outdoor experience?
Embarking on DIY projects for outdoor furniture offers a multitude of benefits beyond mere aesthetics. Not only do you have the freedom to customize designs that reflect your personality, but you also gain the satisfaction of creating something with your own hands. Imagine repurposing reclaimed wood into a stunning lounger that tells a story while being eco-friendly!
This journey allows you to explore various materials and techniques, fostering creativity and resourcefulness. Plus, DIY outdoor furniture can be a budget-friendly solution, ensuring that your dream patio doesn’t come at an exorbitant cost. Join us as we delve into practical tips and inspiring ideas to help you build beautiful outdoor chairs and loungers that will elevate your patio to new heights!
Choosing the Right Materials For Outdoor Chairs and Loungers
When embarking on your DIY outdoor chairs and loungers project, selecting the right materials is crucial for both aesthetics and durability. The most common materials for outdoor furniture include wood, metal, and recycled materials, each offering unique benefits and challenges.
For instance, wood is a classic choice that provides warmth and natural beauty to your patio. However, it requires regular maintenance to prevent rot and weathering.
On the other hand, metal furniture—such as aluminum or wrought iron—offers exceptional durability and can withstand harsh weather conditions. Yet, it may require protective coatings to avoid rusting over time. Recycled materials, like reclaimed wood or repurposed plastic, not only add character but also contribute to eco-friendly patio furniture projects.
To help you decide, consider the pros and cons of each material. Wood, while beautiful and versatile, can be susceptible to pests and moisture unless treated properly. Metal is often more resilient, but it may become hot in direct sunlight.
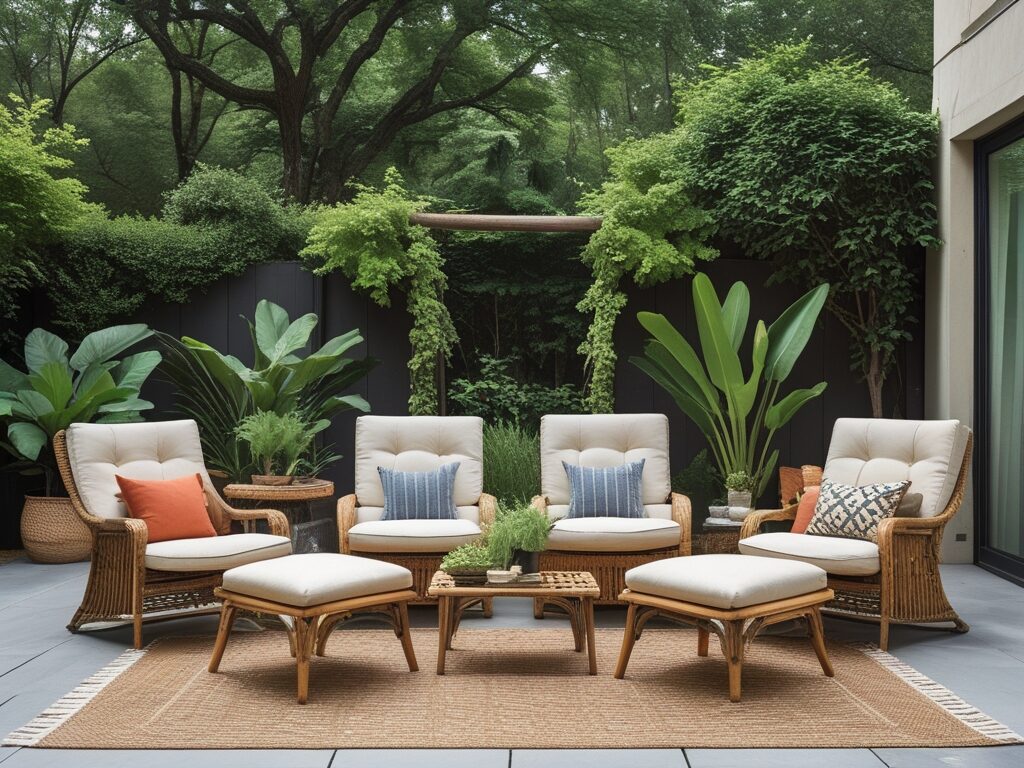
Recycled materials shine in sustainability; however, sourcing high-quality pieces can sometimes be a challenge. Additionally, think about how you want your outdoor chairs and loungers to complement your existing patio decor. A rustic wooden chair might pair beautifully with a natural garden setting, while sleek metal loungers could enhance a modern outdoor space.
Once you’ve selected your preferred material, don’t overlook the importance of weather-resistant finishes. Applying a high-quality sealant or paint designed for outdoor use can significantly extend the life of your furniture.
For wooden chairs and loungers, look for oil-based stains that penetrate deep into the grain, providing protection against moisture and UV rays. For metal pieces, choose rust-resistant paints or powder coatings that will keep them looking fresh year after year.
By investing time in selecting the right materials and finishes, you can create stunning outdoor chairs and loungers that will stand the test of time and elevate your patio experience.
Essential Tools for Your DIY Project
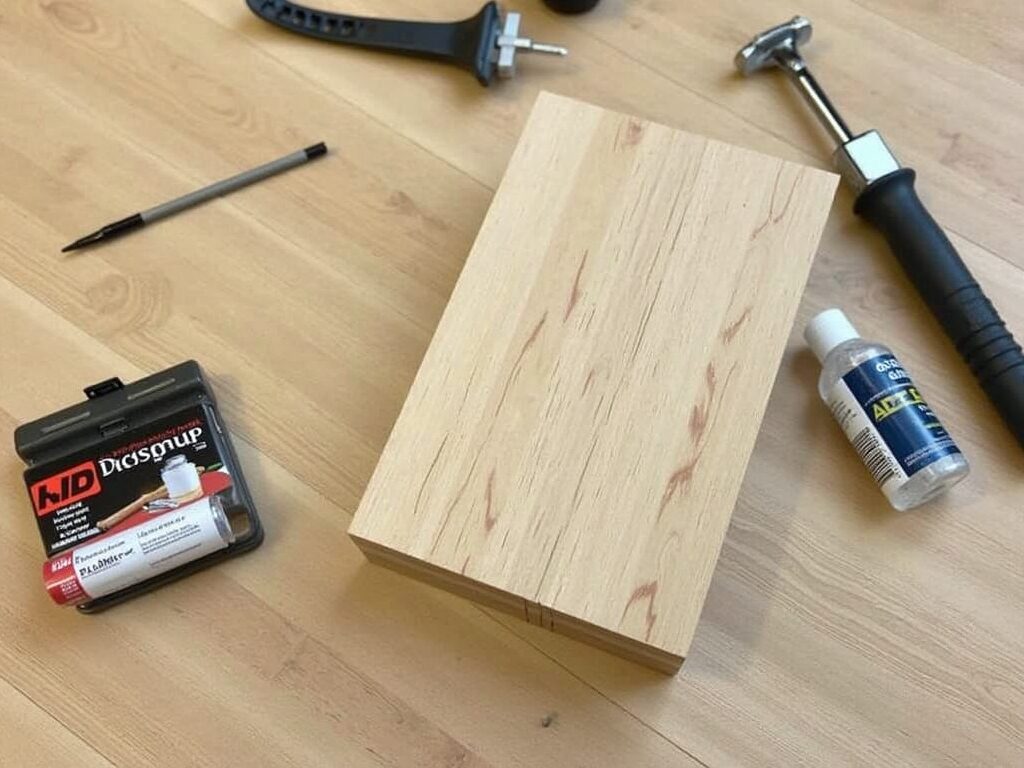
Embarking on a DIY project to build your own chairs or loungers can be incredibly rewarding, but having the right tools at your disposal is crucial for success. At the very least, you’ll need a few basic tools, including a circular saw for precise cuts, a drill for making holes and driving screws, and a measuring tape to ensure everything fits together perfectly.
A square tool will help you achieve right angles, while sandpaper or a power sander will provide that smooth finish essential for comfort. Remember, investing in quality tools can make a significant difference; they not only enhance the quality of your work but can also save you time and frustration.
Safety should always be your top priority when working on any DIY project. Before you dive into building your outdoor furniture, make sure you have appropriate safety gear. This includes safety goggles to protect your eyes from sawdust and debris, gloves to keep your hands safe from sharp edges and splinters, and a dust mask to avoid inhaling harmful particles.
It’s easy to get caught up in the excitement of creating something new, but taking these precautions will ensure that your experience remains enjoyable and accident-free.
While the basic tools are essential, there are several optional tools that can enhance your project. For instance, a jigsaw can be invaluable for making intricate cuts that add character to your design.
If you’re planning to use reclaimed wood or other salvaged materials, a wood planer can help you achieve a uniform thickness, ensuring a polished look. Additionally, a pocket hole jig can simplify the assembly process by creating hidden joints that keep your design sleek and professional.
These tools may not be necessary for every project, but they can certainly elevate your DIY experience and the quality of your finished product.
In summary, equipping yourself with the right tools is key to successfully building your own chairs and loungers. By prioritizing safety and considering optional enhancements, you’ll set yourself up for a productive and enjoyable DIY journey. So gather your tools, put on your safety gear, and let the creativity flow as you transform your outdoor space into a personal oasis!
Step-by-Step Guide to Building a Basic Chair
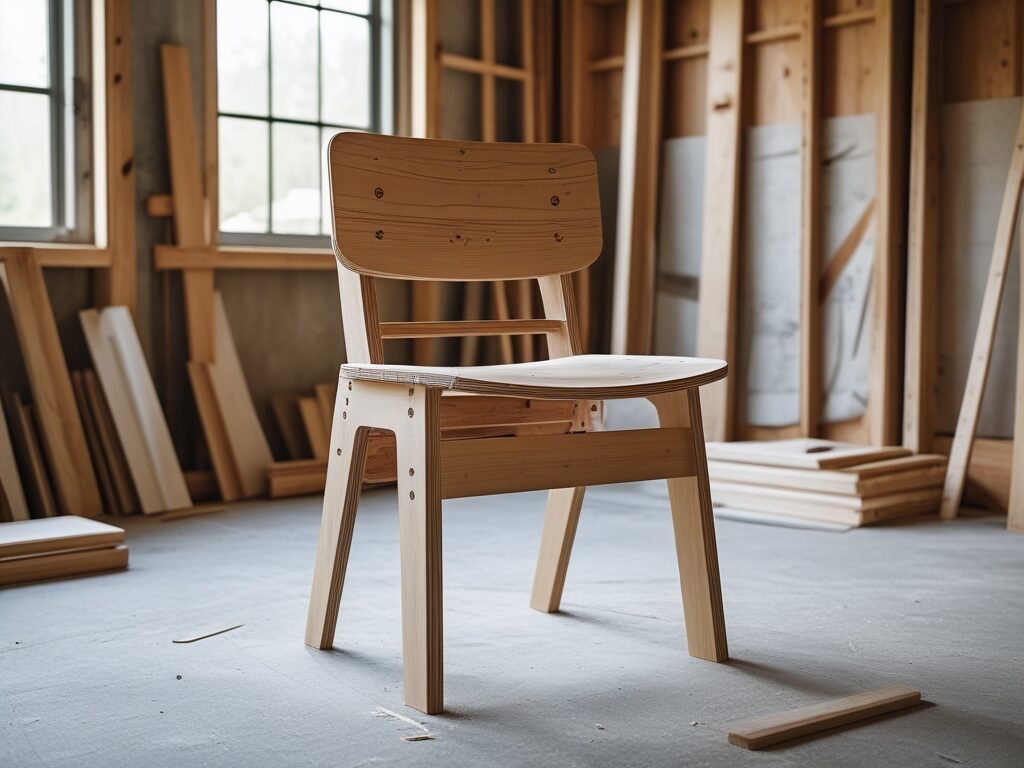
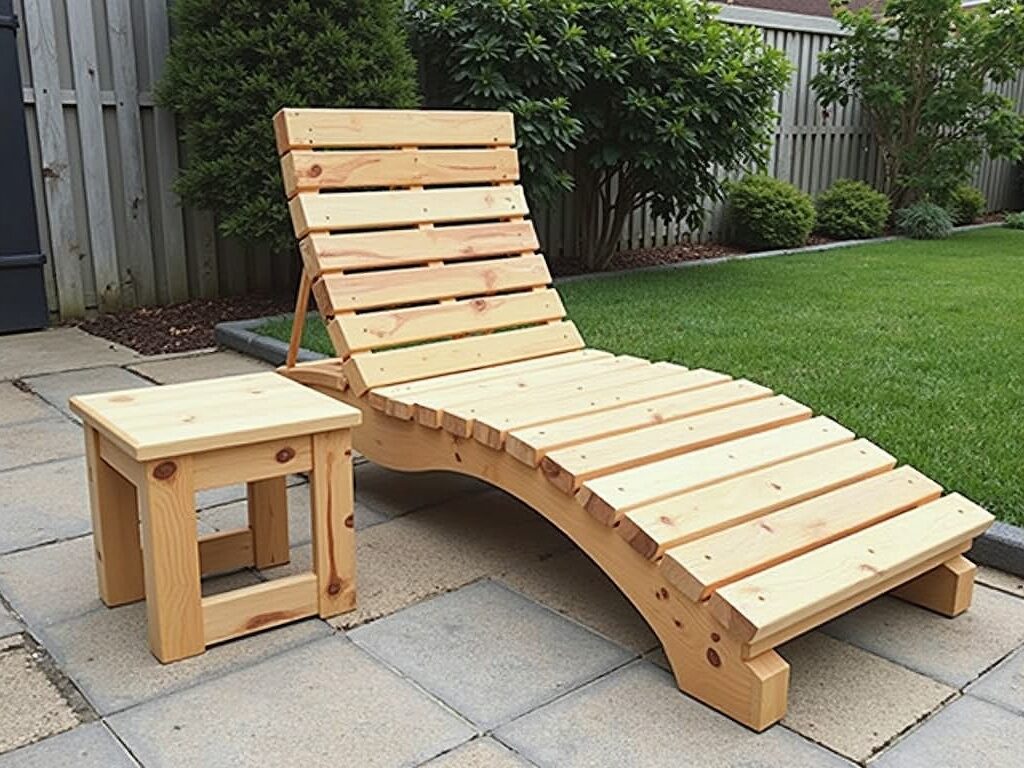
Building your own outdoor chairs and loungers can be an incredibly rewarding project, giving you the chance to customize your outdoor space while saving money. To begin, you’ll need to measure and cut your materials accurately. Start by deciding on the dimensions of your chair.
A standard lounge chair height is around 18 inches for the seat, with a backrest angle of about 90 to 100 degrees for comfort.
Using your measuring tape, mark your wood or chosen material with a pencil, and double-check all measurements to ensure symmetry. For cutting, a circular saw will give you clean lines, but a handsaw works just as well for those who prefer a more hands-on approach.
Once you have your pieces cut—typically including the seat, legs, and backrest—the assembly process begins. Start by attaching the legs to the seat using wood screws for stability. An important tip here is to pre-drill holes to prevent the wood from splitting.
Secure the backrest to the rear legs at an angle that feels comfortable for lounging. For added durability, consider reinforcing the joints with corner brackets or dowels. This not only enhances strength but also adds an aesthetic touch to your outdoor chairs and loungers.
Now that your chair is assembled, it’s time for the finishing touches. Sanding is crucial; it smooths out rough edges and prepares the surface for painting or staining. Use a fine-grit sandpaper to ensure a polished look—this step will make a significant difference in both appearance and safety.
After sanding, apply a weather-resistant finish to protect your chair from the elements. A high-quality outdoor paint or sealant can help preserve its beauty through sun and rain.
If you’re looking for a pop of color, this is also the perfect time to get creative! Choose vibrant colors that reflect your personality or opt for natural stains that highlight the wood’s grain.
Incorporating these steps into your lounge chair plans will not only equip you with practical skills but also result in a beautiful piece of furniture that enhances your outdoor living area. So gather your materials and tools, and let your creativity flow as you embark on this DIY journey!
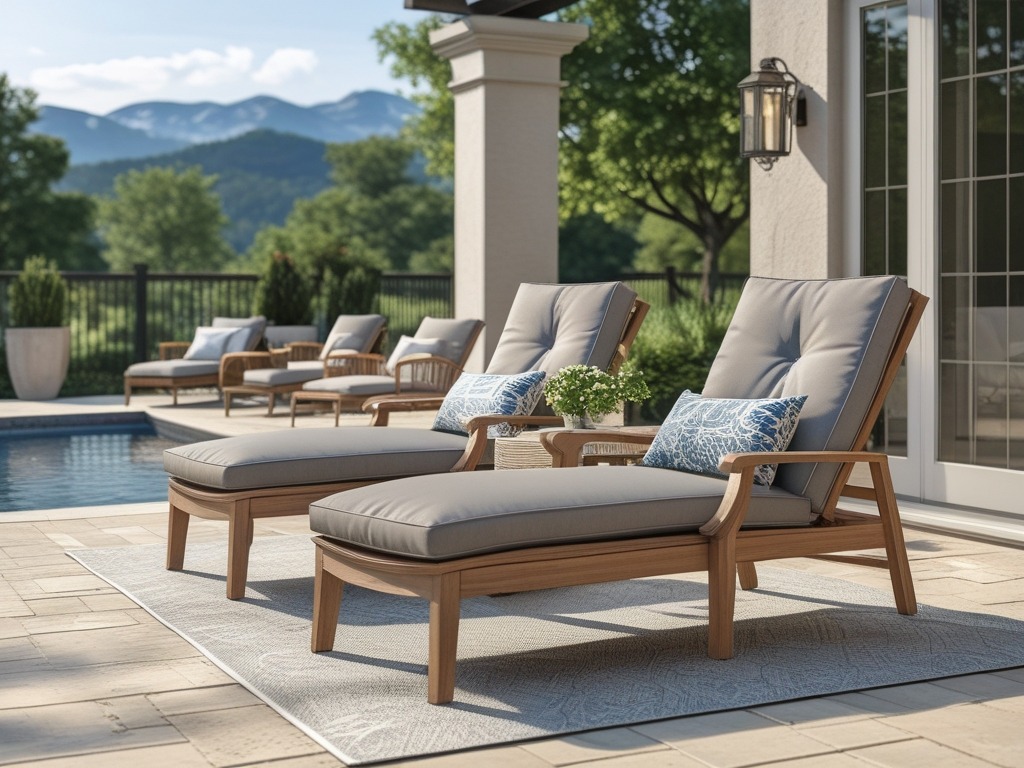
Crafting a Cozy Lounger
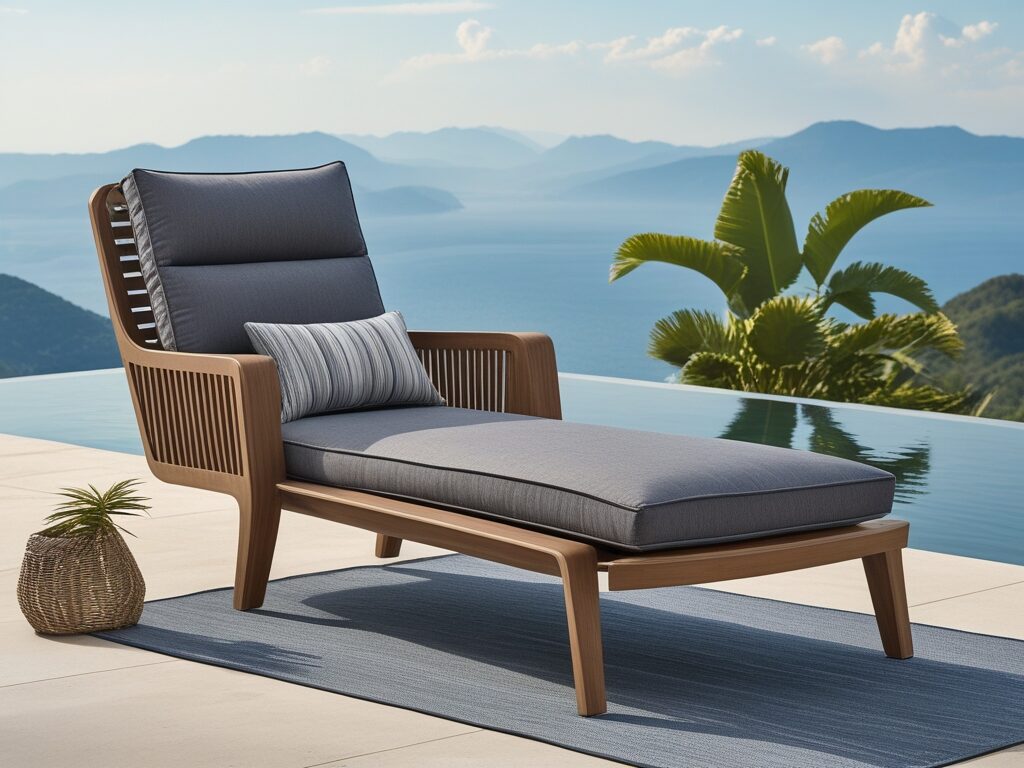
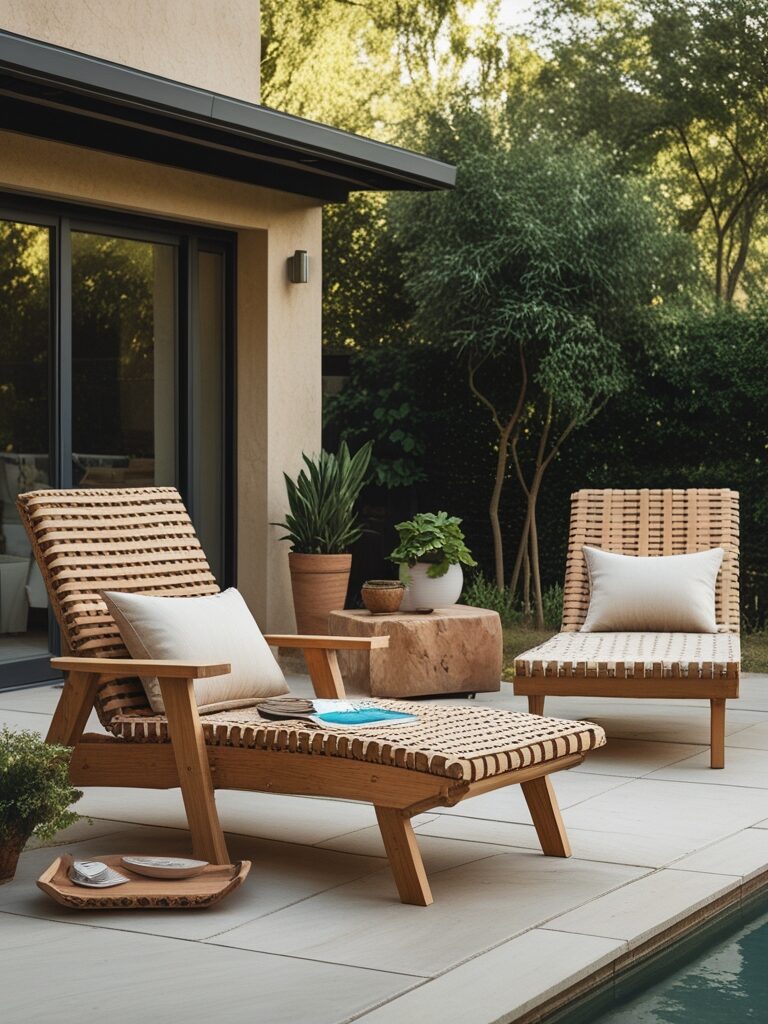
Creating a cozy lounger for your patio can transform your outdoor space into a personal retreat. When it comes to design, consider options that prioritize both comfort and style.
For instance, a wide, low-profile lounger with a contoured seat can invite relaxation, while a classic Adirondack style offers timeless appeal. Incorporate elements like wide armrests for resting drinks or books, and think about adding a slight curve to the backrest for ergonomic support.
You might even explore unique shapes, such as a curved lounge chair that mimics the natural flow of your garden, blending functionality with aesthetics.
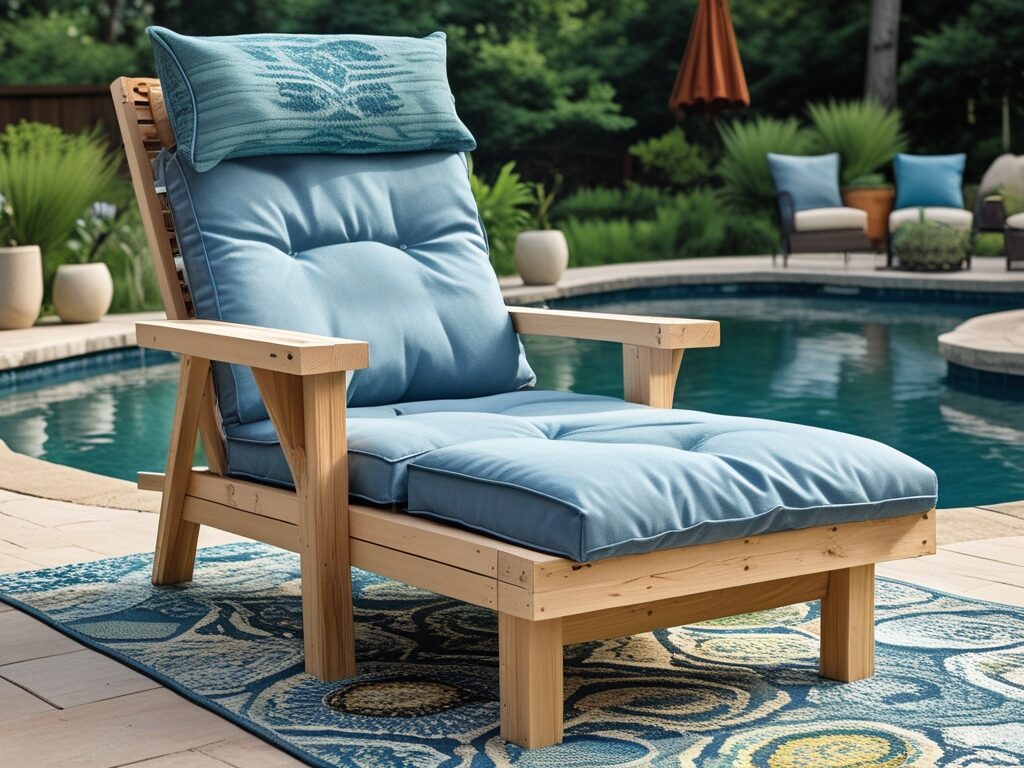
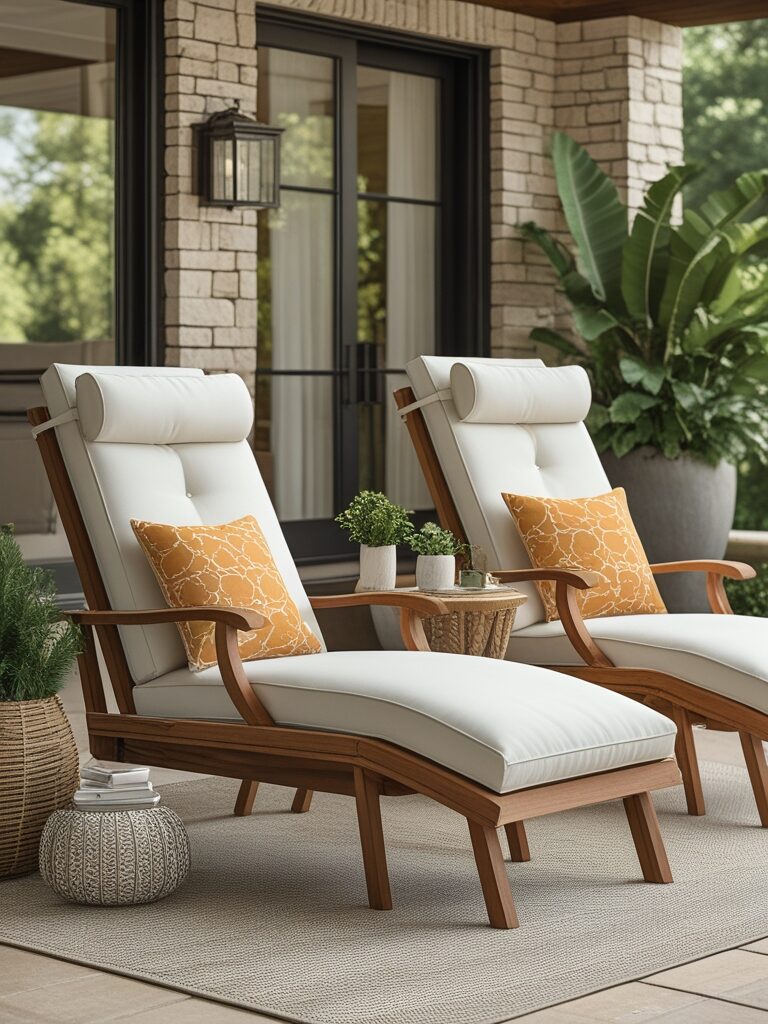
One of the key features to enhance your lounger is an adjustable backrest. This flexibility allows users to find their perfect lounging angle, whether they’re soaking up the sun or enjoying a good book in the shade.
To create an adjustable backrest, start by constructing a sturdy frame that can pivot. Use hinges to attach the backrest to the seat, enabling it to move between several positions. By adding support beams underneath the backrest, you ensure stability and durability, allowing for comfortable reclining without compromising safety.
To elevate your lounger’s comfort level further, consider adding cushions and upholstery. Outdoor fabrics are essential here; look for materials that are UV-resistant and water-repellent to withstand the elements. You could make simple cushion covers using weather-resistant fabric in vibrant colors or patterns that reflect your personal style or the theme of your garden.
Don’t shy away from experimenting with textures—think about mixing smooth canvases with soft, plush fabrics for a cozy feel. Throw pillows can also be a delightful addition, providing extra comfort and an opportunity to incorporate fun patterns or seasonal designs.
Incorporating these design ideas and practical features into your DIY lounger will not only enhance your outdoor seating ideas but will also create an inviting atmosphere that encourages relaxation and enjoyment in your patio oasis. So roll up your sleeves, gather your materials, and let your creativity flow as you craft the perfect cozy retreat!
Creative Upcycling Ideas For Your Outdoor Chairs and Loungers
Upcycling is a fantastic way to transform old furniture into stylish outdoor chairs and loungers, breathing new life into items that might otherwise end up in a landfill. Instead of purchasing new pieces, consider scouring your garage, attic, or local thrift shops for items that can be creatively repurposed.
For instance, an old wooden ladder can be converted into a unique lounge chair by adding a cushioned seat and some colorful outdoor fabric. This not only provides a one-of-a-kind seating option but also serves as an eye-catching statement piece in your creative outdoor spaces.
Another great example of upcycling is using discarded pallets to create rustic outdoor furniture. Pallets can be stacked and secured to form a sturdy base for a couch or loungers, offering a casual, laid-back vibe perfect for summer gatherings. With a bit of sanding and some weather-resistant paint or stain, you can customize the look to fit your patio aesthetic. Adding plush cushions will elevate comfort while ensuring your upcycled furniture remains inviting and functional.
The benefits of eco-friendly DIY projects extend beyond just saving money; they contribute to a more sustainable lifestyle. By choosing to upcycle rather than buy new, you’re minimizing waste and reducing your carbon footprint.
Additionally, these projects often require minimal investment in materials, allowing you to allocate funds toward other enhancements for your outdoor space. Every time you repurpose an old chair or table, you’re not just creating beautiful outdoor furniture; you’re also making a positive impact on the environment.
As you embark on your upcycling journey, remember that the possibilities are limited only by your imagination. Consider using old garden tools as decorative accents on your patio or transforming a vintage suitcase into a unique side table.
The charm of upcycled furniture lies in its story and uniqueness, making your outdoor area not only stylish but also personal. So gather those forgotten treasures and let your creativity run wild!
Personalizing Your Outdoor Chairs and Loungers
Transforming your outdoor chairs and loungers into personalized pieces can elevate your patio’s aesthetic while reflecting your unique style.
One of the most exciting aspects of DIY woodworking projects is the opportunity to customize colors and designs.
Consider using bold, bright hues to create a vibrant outdoor space or opt for soft pastels for a more serene atmosphere.
If you’re feeling adventurous, why not try a two-tone effect?
Paint the seat one color and the legs another for a contemporary twist that makes your furniture stand out.
Stencils, paints, and natural stains are fantastic tools for decoration that allow you to get creative. Stenciling intricate patterns or motifs onto your furniture can add an artistic flair that speaks to your personality. For example, if you love nature, try stenciling leaf designs or floral patterns in complementary colors.
Natural stains are another excellent option; they enhance the wood’s grain while providing protection against the elements. Using eco-friendly stains can further align your DIY projects with a commitment to sustainability, making your outdoor space both beautiful and responsible.
Incorporating personal touches like monograms or unique patterns can truly make your outdoor furniture one-of-a-kind. Imagine adding your family name or initials to the backrest of a chair using a stencil—it’s a simple yet impactful way to personalize your seating.
You could also explore creating a themed look that resonates with your interests, such as nautical stripes for beach lovers or geometric designs for modern enthusiasts. These small details not only personalize your furniture but also create conversation starters for guests.
Remember, personalizing your outdoor furniture is all about expressing who you are while enhancing the beauty of your space.
Dive into these creative options, and let your imagination guide you as you embark on this exciting woodworking journey. The result will be a cozy and inviting patio area that feels uniquely yours, perfect for relaxing afternoons or lively gatherings with family and friends.
Maintenance Tips for Longevity
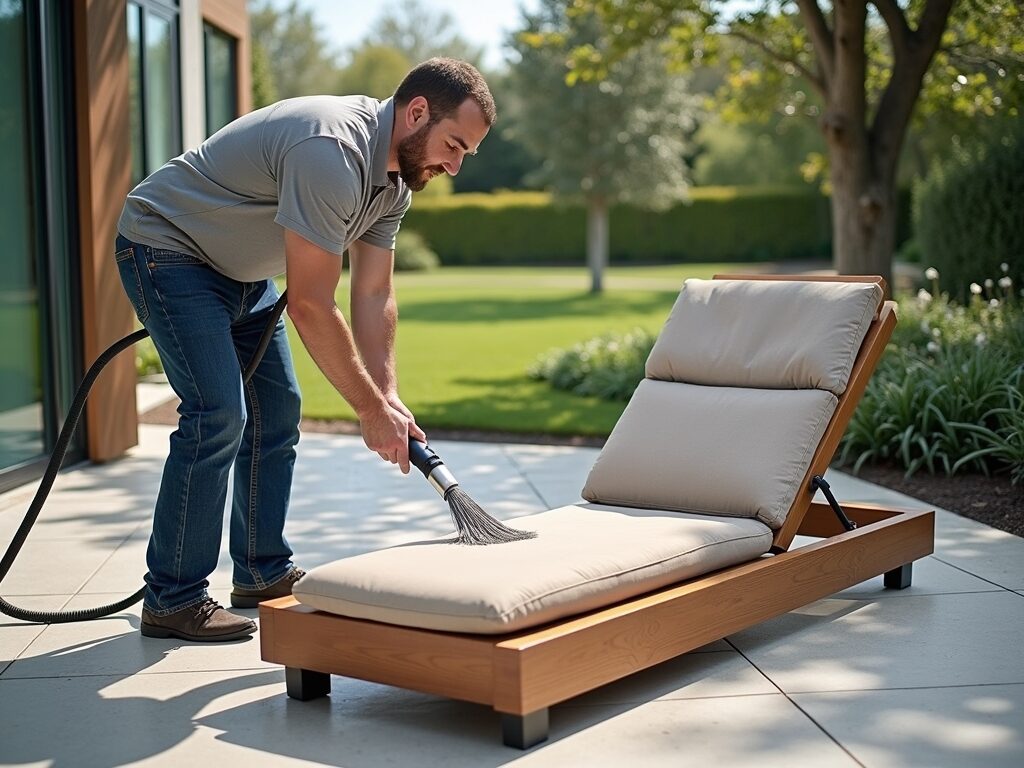
Taking care of your DIY outdoor chairs and loungers is essential to ensure they remain functional and visually appealing for years to come. One of the best practices for maintaining your budget-friendly furniture is regular cleaning.
Dust, dirt, and debris can accumulate, especially after windy or rainy days. A simple rinse with a garden hose or a gentle scrub with mild soap and water can do wonders. For wooden pieces, consider using a soft bristle brush to get into the crevices without damaging the finish. This not only keeps your furniture looking fresh but also prevents potential deterioration from moisture and mold.
Seasonal maintenance routines are crucial for protecting your outdoor chairs and loungers from harsh weather conditions. Before winter arrives, it’s wise to cover your furniture or store it indoors if possible. A breathable cover can prevent moisture buildup, while cushions should be stored in a dry place to avoid mold growth.
In spring, inspect for any damage caused during the colder months—look for cracks, rust, or peeling paint. Taking time to sand down rough spots and reapply protective finishes will help keep your furniture in top shape throughout the season.
Knowing when to repair or refurbish your DIY pieces can also save you money in the long run. If you notice minor issues like loose screws or wobbly legs, address them immediately to prevent further damage. For wood chairs that have seen better days, a fresh coat of stain or paint can breathe new life into them and enhance their appeal.
On the other hand, if your loungers are starting to sag or the fabric is fraying, consider replacing the upholstery rather than tossing them out. This not only extends the life of your outdoor furniture but also gives you another opportunity to personalize your space.
In summary, investing a little time and effort into maintaining your outdoor chairs and loungers can significantly increase their longevity and enjoyment. By regularly cleaning, following seasonal care tips, and being proactive about repairs, you can ensure that your DIY projects continue to bring comfort and style to your patio for many seasons to come.
Inspiring DIY Projects from the Community
The world of DIY outdoor furniture is brimming with creativity, and there’s no better place to find innovative designs than within the vibrant community of DIY enthusiasts.
From stunning reclaimed wood chairs that tell a story to sleek modern loungers crafted from metal pipes, these projects showcase the remarkable talent and ingenuity of fellow makers.
One standout example is a group of DIYers who transformed old pallets into chic outdoor seating.
By sanding down the rough edges and adding cushions, they created personalized patio decor that not only looks fantastic but also promotes sustainability.
Joining online communities dedicated to DIY projects can be a game changer for anyone looking to enhance their outdoor spaces. Platforms like Pinterest, Instagram, and specialized DIY forums are treasure troves of inspiration, where you can connect with others who share your passion.
For instance, many users regularly post photos of their completed projects along with detailed tutorials and tips. Engaging in these communities allows you to ask questions, share your progress, and even collaborate on ideas, fostering a supportive environment that can help you elevate your own DIY endeavors.
Additionally, there are countless resources available that cater to DIY lovers seeking fresh ideas and guidance. Websites such as Instructables and Ana White provide step-by-step instructions for various outdoor furniture projects, complete with materials lists and diagrams.
You might stumble upon a unique outdoor sofa built from cinder blocks or a hammock chair made from an old swing set frame! These resources empower you to think outside the box and experiment with different styles, ultimately leading to personalized pieces that reflect your individual taste and lifestyle.
As you embark on your DIY journey, remember that inspiration is all around you. Whether you’re browsing social media or participating in local workshops, the experiences and insights shared by others can spark your creativity. So grab your tools, gather some friends, and dive into the wonderful world of crafting your own outdoor chairs and loungers—your personalized patio decor awaits!
Embrace Your DIY Spirit
Creating your own outdoor chairs and loungers not only adds a personal touch to your patio but also brings countless benefits.
From saving money to enhancing your outdoor space with unique designs, these DIY projects allow you to express your creativity while enjoying the satisfaction of building something with your own hands. Imagine sipping your morning coffee or unwinding after a long day in a chair you crafted yourself – it’s an experience that can’t be beaten!
So why wait? Dive into the exciting world of DIY and start your project today! Whether you’re a seasoned craftsman or a curious beginner, the journey of building outdoor furniture is rewarding and fun.
Don’t forget to share your completed projects and experiences with the community; your creativity could inspire others to embark on their own DIY adventures. Let’s transform our patios together and create inviting spaces for relaxation and enjoyment!
Find Outdoor Chairs And Lounger For Your Patio From Here
FAQs for Outdoor Chairs and Loungers Design for Balcony with DIY Magic
For durability and style, consider weather-resistant woods like cedar or teak, or opt for lightweight metal frames. You can also use UV-resistant fabrics for cushions to ensure they last through the seasons.
Measure your balcony space before you start! Look for chairs that provide comfort without overcrowding your area—aim for at least 2-3 feet of walking space around your furniture.
Absolutely! Many DIY projects require just basic tools like a saw, drill, and screwdriver. Look for simple designs that use pre-cut wood or ready-made kits to make the process easier.
Unleash your creativity! Paint them in vibrant colors, add stencils or decals, or sew unique cushion covers. You can even attach hanging planters for a beautiful touch!
Seal and finish your wooden chairs with a high-quality outdoor sealant. For metal frames, consider rust-resistant paint, and always store cushions indoors when not in use.
Definitely! Reclaimed wood is a fantastic choice for sustainable furniture. You can also use recycled materials or non-toxic paints and finishes to keep your project green.
Cushions are key! Choose thick, plush cushions made from outdoor fabric for comfort. Add throw pillows and blankets to create an inviting, cozy atmosphere.
Look for folding chairs or stackable loungers that can easily be stored away. You can also use wall-mounted benches or hanging swings to maximize your space while keeping it stylish!